تفاصيل المنتج
Heavy Duty Tough Sleeve
7 شاهد الناس هذا العنصر خلال الأسبوع الماضي
الكمية:
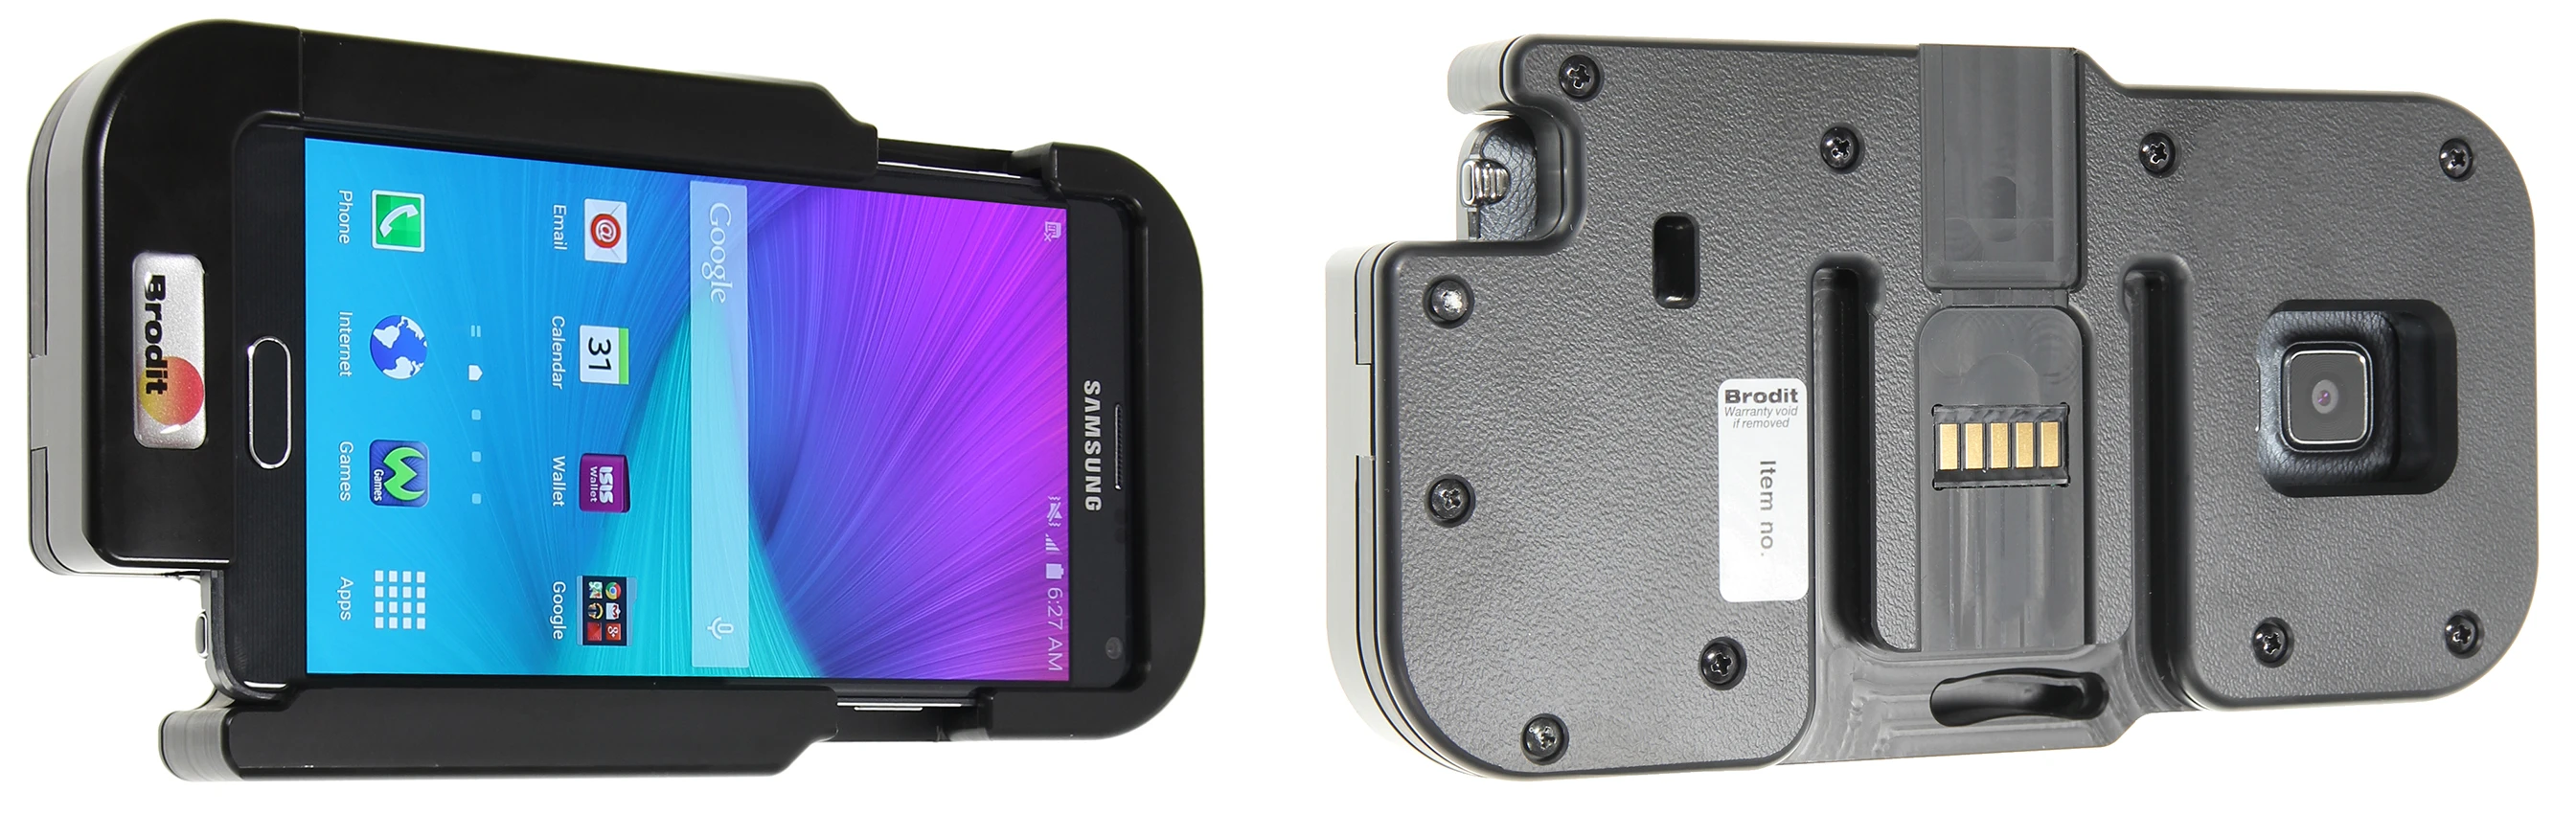
The choice for you who use your device every day in a rough environment! Your device is well protected in a heavy duty tough sleeve, in the same time as it gets charged. You can easily take the device with you and move it between vehicle-vehicle or vehicle-office.
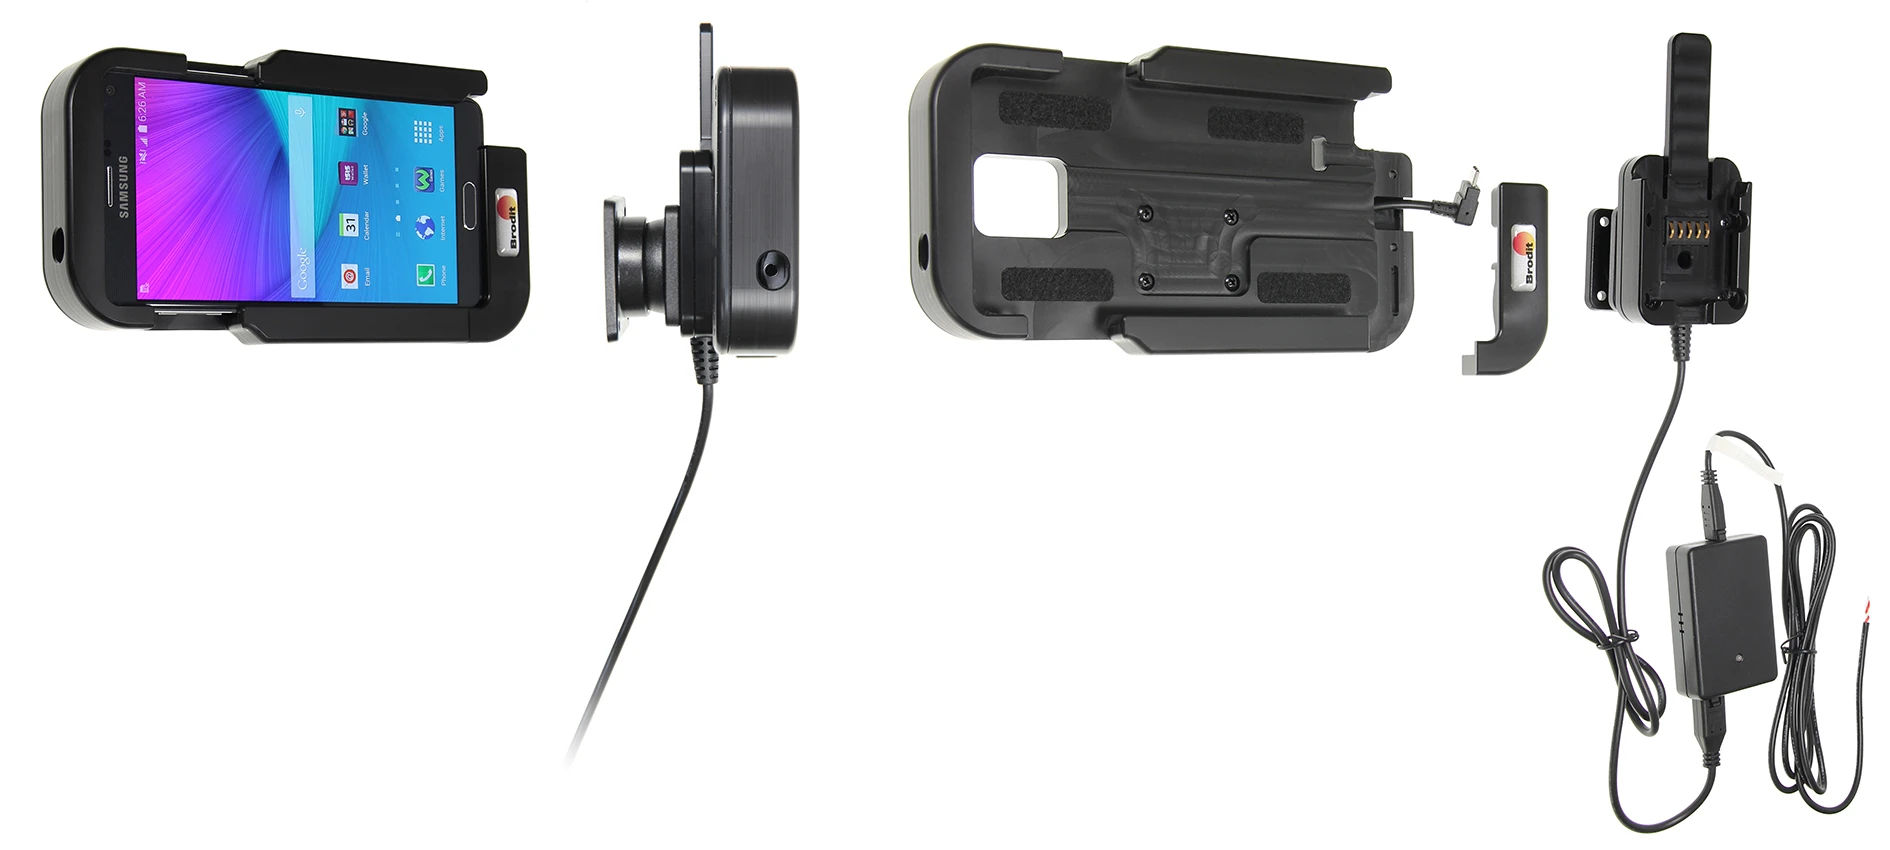
First you place your device in the heavy duty tough sleeve, which is a robust case/jacket with built in bumpers. The bumpers reduce vibration and help protect the device if dropped. Then you attach the sleeve onto an active MultiMoveClip by pressing it downward onto the mount. When it snaps into place, the charging is automatically connected via the Sliding Power Block. Thanks to the quick connector, you also remove the sleeve from the MultiMoveClip in an instant. The charging connector is durable to withstand frequent wear in everyday professional use.
The device is firmly in place in the sleeve and can not be removed without loosening the screws. You have full access to the camera and all buttons when the device is in the sleeve. For fixed installation. 12/24 V. The product is E-approved. Connect the power cable with a 2 A fuse. Professional installation recommended. Equipped with a tilt swivel so you can easily switch between portrait and landscape mode. Made of black ABS- och Acetal plastic. Made in Sweden. Attach onto a Pedestal Mount or extra strength mounting platform.
Sleeve Dimensions: 182 x 99 x 25 mm (W x H x D mm). Weight: 265 g.
MultiMoveClip with Sliding Power block for fixed installation: Builds 35 mm to the sleeve depth and 20 mm to the height.
Charging specifications:
Input voltage: DC/10-30V
Charging voltage: DC/4.75-5.3V
Output current(Typ): 2.0A
Input & output protection: Input polarity reversal/Output over voltage/Output over current/Output short protection
LED charging indicator: Power input indicator(Green), Ovp/Ocp/Output short(Red)
Operating temperature: 0°C ~ +40°C
Storage temperature: -20°C ~ +80°C
RoHS compliant: ROHS
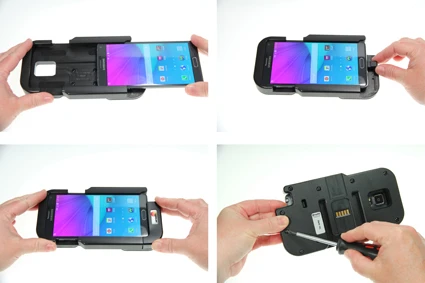
دليل تركيب المنتج
رقم الخطوة 1
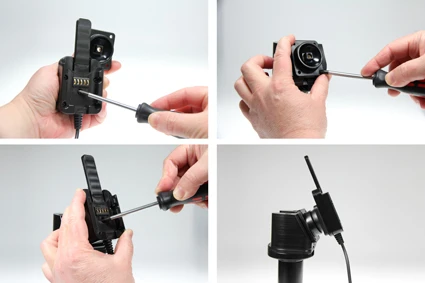
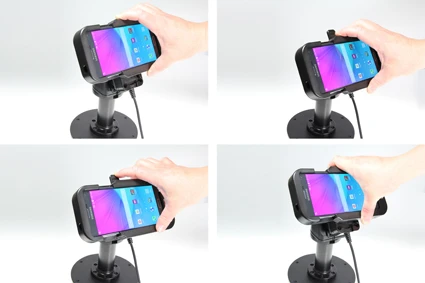
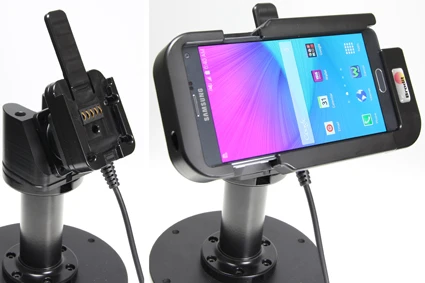
Connect White wire to a Negative Ground connection of vehicle or vehicle chassis. 2. Connect Red wire to a 12/24 Volt power supply in vehicle that is controlled by ignition switch of vehicle. 1. Slide device sideways into sleeve. Connect charging STRAIGHT into to the device (connecting it askew, means risk of damages). Place lid over connector and attach it by screwing enclosed screws into place on back side of sleeve. The device is now in place and can not be removed without loosening the screws. 2. Loosen screw in center of Power Block so you can remove the tilt swivel attaching plate on back. Place attaching plate onto desired position and screw it into place with enclosed screws. Place Power Block over attaching plate so the screw fits in tilt swivel hole. Tighten screw until the MultiMoveClip is firmly in place, but still can be adjusted. 3. Place sleeve above Power Block and slide/press it straight downward into Power Block so you hear/feel it snaps into place (connects to charging). Press forward on release arm on Power Block so sleeve is set free. Press/lift sleeve straight upward. 4. The product is in place.

John Doe
Exceptional sound quality and comfort
Lorem ipsum dolor sit amet, consectetur adipiscing elit. Vestibulum at lacus congue, suscipit elit nec, tincidunt orci. Phasellus egestas nisi vitae lectus imperdiet venenatis. Suspendisse vulputate quam diam, et consectetur augue condimentum in.

Jane Smith
Great headphones, battery could be better
Lorem ipsum dolor sit amet, consectetur adipiscing elit. Vestibulum at lacus congue, suscipit elit nec, tincidunt orci. Phasellus egestas nisi vitae lectus imperdiet venenatis.
Michael Johnson
Impressive noise cancellation
Lorem ipsum dolor sit amet, consectetur adipiscing elit. Vestibulum at lacus congue, suscipit elit nec, tincidunt orci. Phasellus egestas nisi vitae lectus imperdiet venenatis. Suspendisse vulputate quam diam.